Showing posts with label herbs. Show all posts

A 'choke by any other name

I went to our local farmer’s market on Saturday determined to find something new.  The first thing that caught my eye was a bin of Jerusalem artichokes (also known as sunchokes or earth apples).  Not only had I never eaten them or cooked with them, I'd never even seen one in person.  I picked out a pound of the ginger looking vegetables and brought them home. (They do look like ginger, don't they?)

 Photo by Susan Wenzel

I sent out an APB for recipes on twitter and found a real winner on Saffron & Honey’s blog.  She suggested I try her Jerusalem artichokes with garlic, rosemary, and chives.  I just happened to have a ton of beautiful rosemary and decided to cook up a batch.

Photo by Susan Wenzel

I followed her recipe but used regular garlic (instead of Elephant garlic because that’s what I had) and completely forgot about the bay leaves she suggests.  Nonetheless, they were delicious – crispy and flavorful and a texture akin to nothing I’ve ever had before (ok, maybe they were a little bit like fresh water chestnuts).  Everyone loved them – even the picky eaters – and asked when we can have them again.  I insist you check out the recipe if you have a pile of ‘chokes and no idea what to do with them.  Or, even better, make a point of buying some and trying them.  
   
But, now that I knew how to cook them (further perusal indicates they play like any other root veggie - stewed, mashed, pureed), I had to find out WHAT they were.  


Ok, first thing…they are not the same thing as the regular pine cone looking artichokes (Cynara cardunculus).  Second…they have nothing to do with Jerusalem.  Jerusalem artichokes (Helianthus tuberosus) are actually the tuber of a type of sunflower.  The aforementioned green, spiky artichokes are closely related to thistles (which explains their prickly appearance).  However…both artichokes and Jerusalem artichokes are in the daisy family (Asteraceae) along with dahlias, Echinacea, chrysanthemums, zinnias, and iceberg lettuce.  But, I digress…

The name still stumps me.  Some say the second half of the name is because these taste like the thistle-related artichoke, but I don’t buy it.  I also read that the Jerusalem part is, in theory, based on an age-old mispronunciation.  Girasole is the Italian word for sunflower and sounds like “Jerusalem” – sorta.  But, I don’t necessarily believe that either.  The name "sunchoke" makes more sense...because of the whole sunflower thing...but still...

Never mind why they are called what they are…I’ll just call them delicious!

PS - I've always vowed to be 100% honest about everything I write, so be forewarned...sunchokes are rich in vitamin C, phosphorus, potassium, and inulin.  Inulin is an...ahem...potent source of dietary fiber.  Which means these are healthy for your intestines...if you catch wind of what I am trying to say.  

Pesto, Please!

Part two of Spring Break out the Fat Pants is still in progress, but I’ve had multiple requests for pesto instead – both the dish and the recipe.  Fortunately, I also have a glut of basil and Italian parsley in my Aerogarden (yes, I still LOVE that thing!), so pesto pasta is what’s for dinner tonight and my besto pesto recipe is what’s for blog today.


Photo by Susan Wenzel

I'll be serving the pesto over Trader Joe’s fusilli pasta (I like how the sauce clings to the spirals of the pasta shape, and the flavor and texture of TJ’s fusilli is the best, bar none).  I also plan to toss in chunks of leftover Easter ham.  Yum!  

Pesto is equally delicious with pasta and peas (or just peas or just pasta), stuffed in chicken breasts, or on bread, pizza, shrimp…ok, ok, it’s good on nearly everything (but ice cream).  Pesto is as wonderfully versatile as it is exquisitely fragrant and gorgeously green. 

Here’s the how-to:

A Good Cooker’s Besto Pesto

Ingredients:
2c fresh basil leaves (packed)
1/4c fresh flat leaf Italian parsley (packed)
3 cloves garlic
1/4c pine nuts
1/2-1t salt (more or less to taste)
1/2c good extra-virgin olive oil (I like Filippo Berio)
1/4c grated parmesan (or Romano or Asiago or any combo of the three)

Instructions:
-Toast pine nuts in a non-stick skillet over med-high heat until golden brown, oily looking, and fragrant (3-4 minutes).  Remove from pan and set aside to cool.
-Blanch garlic cloves in boiling water for one minute (or put them in 1/2c water and microwave for 1 minute).  Set aside to cool.
-Place first five ingredients into food processor and pulse until chopped.
-Turn on food processor, drizzle in olive oil, process until smooth scraping sides of work bowl as necessary. 
-Add grated cheese and pulse four or five quick bursts just to combine.
-Use as desired.

Photo by Susan Wenzel

Ham and Pesto Pasta: Cook 1lb fusilli as per package directions and chunk up twelve ounces of ham into 1/2” cubes.  Drain pasta, reserving 1c pasta water.  Place cooked pasta, ham chunks, and 1/4c pasta water back in cooking pan over medium-low heat.  Add desired amount of pesto (I use it all!) and quickly stir to combine.  Add additional water to achieve desired sauce thickness.  Cook no longer than 2-3 minutes more after combining pesto and pasta to preserve flavors.  Adjust salt at this time if necessary.  Serve immediately topped with an extra sprinkle of cheese if desired.  Makes 4 hearty servings or four modest servings plus one lunch-sized bowl for the next day. 

Photo by Susan Wenzel

Note: Unused portions of pesto may be frozen for up to six months – not that it ever lasts that long in my house – actually it never seems to make it to the freezer.  I usually use the whole batch in one meal, as my kids adore pesto.  When I do freeze it, I place desired portions in a square of plastic wrap and twist-tie shut.  (I use the same method to freeze leftover tomato paste in 1-2T portions or 1/4c measures of bacon grease for cornbread).

Baffled by Basil

My Thai basil is freaking out.
 

It has, in my experience, grown to gargantuan proportions.  I finally had to trim it back today, as it was shading the sweet basil, oregano, and sage.  Not only are the plants themselves laden with countless individual leaves, but the largest, when flattened, are near six inches long and four wide.  The problem is, they look NOTHING like typical Thai “sweet basil” (bai horapha) with its purplish stem and smaller, flatter, more pointed leaves.  (I grew “Queen of Siam” this summer and the plants were completely different from the ones I am growing now.) 


There are primarily three kinds of basil used in Thai cooking - the aforementioned bai horapha, bai kaprow also known as Thai “holy basil,” and Thai “lemon basil” or bai maeng-lak – none of which look anything like the mutant monsters in my kitchen.
 
These particular seeds came with my AeroGarden custom seed pod kit, so I am clueless as to the cultivar I am cultivating.  I know many plants send out two large cotyledon first (the so-called seed leaves and the first to pop out of the embryo - most evident on legumes) but my plants have dozens of the fan sized flora up and down the stem.  I almost think I am growing imposters, but they do have the wonderful fragrance and distinctive anise-like flavor – albeit noticeably milder than the traditional Thai basil I have come to love. 

I’m so confused – now I’m freaking out.  But…it’s not going to stop me from using my basil bounty – Thai or not – when I make Pattaya Shrimp tonight. 

I still think I might call the company.

To be continued…

Spicy Show and Tell

I’m so excited, and I just can’t hide it!  My Spice House package just came!  I’ve been ordering from them for a few years now and remain nothing but impressed.  Not only is the product always incredibly fresh, but it is also perfectly packaged every single time.  The result is pristine looking herbs and spices that look as if I picked them myself (I wish).


I usually place my order based on the things I consider necessities and then add in a few new items I’d like to try.  Here’s what I received today:

WANT TO TRY
Greektown “Billygoat” Seasoning.  I make my own gyros and tzatziki sauce and adore roast lamb, so purchasing this new-to-me Greek salt blend was a no-brainer.  (Ingredients: coarse flake salt, granulated garlic powder, Tellicherry black pepper, onion powder, Greek fancy oregano and powdered lemon peel)


SHOULD HAVE
I’ve been considering buying this Italian blend for some time and, now that I frequently make my own spaghetti sauce, I decided it was time.  I grow my own oregano, basil and rosemary and just bought thyme, but this mouth-watering mix contains marjoram too - all in a perfectly proportioned package.

The garlic and poppy seeds are destined to adorn my ArtisanBread in Five Minutes a Day everything bagels!  Oh, and the caraway seeds are for my Artisan Bread rye bread dough already prepped and ready in the fridge.  (Mmmmm…Reubens!)  

     
MUST HAVE
I rarely make a dish that doesn’t use one of these decadent duos: coriander and cumin or thyme and sage.  The chili powder too is an absolute necessity (shhh…it’s a secret ingredient in my award winning chili.)

 
NEED TO HAVE
I would never have learned about my two new obsessions if it weren’t for The Spice House.  One is the delicious in a Bloody Mary, hot to trot Vulcan's Fire Salt – a House exclusive (As we speak, I’m enjoying a bowl of vegetable soup with a little sprinkle of His Habañero Highness).  The other - Korean Black garlic – I would never had tried if it weren’t for their tasty description.  I am a garlic lover but was surprised by the rich, nutty flavor of this aged and fermented version.  It’s delicious in chicken soup but even better added to Japanese ramen broth (I prefer the fresh noodle version, bar none). 


Now that my spice drawer (yes, I have an entire drawer dedicated to the savory stuff – less the saffron which lives in a vacuum packed pouch in the freezer) is happy, so am I.  My only trouble is deciding which one to use first!

Rival Roaster Rules!

I’ve always wanted a kitchen with two ovens – or, two ovens in my kitchen.  Whichever.  I find it frustrating when I have to remove the roast to put the side dishes back in my single oven or take out the lasagna to bake the bread...and so on.  Until I get a spare 10 grand to remodel the eatery – 20 if I get the custom granite countertops I saw at IKEA - it ain’t gonna happen.
 
In the meantime, my 12yo daughter has inadvertently come up with a temporary solution to the problem.  On Christmas morning this year she proudly slid the biggest box under the tree over to me.  She said she saved her money to buy something “that I really needed.”  Inside, I was surprised to find a 22 quart Rival brand roaster oven.  My grandmothers each had one, and my mother too – but me?  I hadn't even considered owning one.


But, now that I too had one, I used it.  For New Year’s Day, I loaded it up with a big brined turkey (1c salt/2gal water/12hours).  The instructions said to cook it for 13-19 minutes per pound at 375 degrees.  For my 16-pounder, this meant it would be done in as little as 3.5 hours or as long as 6.  I decided to compromise and check it at 4.  I was shocked to find it done – maybe even a little too done, as the upper parts of the legs looked a little crisp.  Nevertheless, the skin was golden hued and the meat was as tender and juicy as any turkey I’d ever cooked before – in far less time.

A few weeks later, I brined a 5lb local family farm raised pork shoulder roast (.25c salt/2qt water/2 hours) and roasted it at 350 degrees at 25-30 minutes a pound.  Again – done in record time, tender and juicy.  For the final test, I set one of my local family farm raised, grass fed beef roasts I’d coated with fresh ground black pepper, onion powder and garlic powder on the rack and added a cup of red wine to the bottom of the roaster.  Not only did it produce a tender juicy result but also gave me a cup of tasty pan drippings for a fine gravy.  I was amazed.


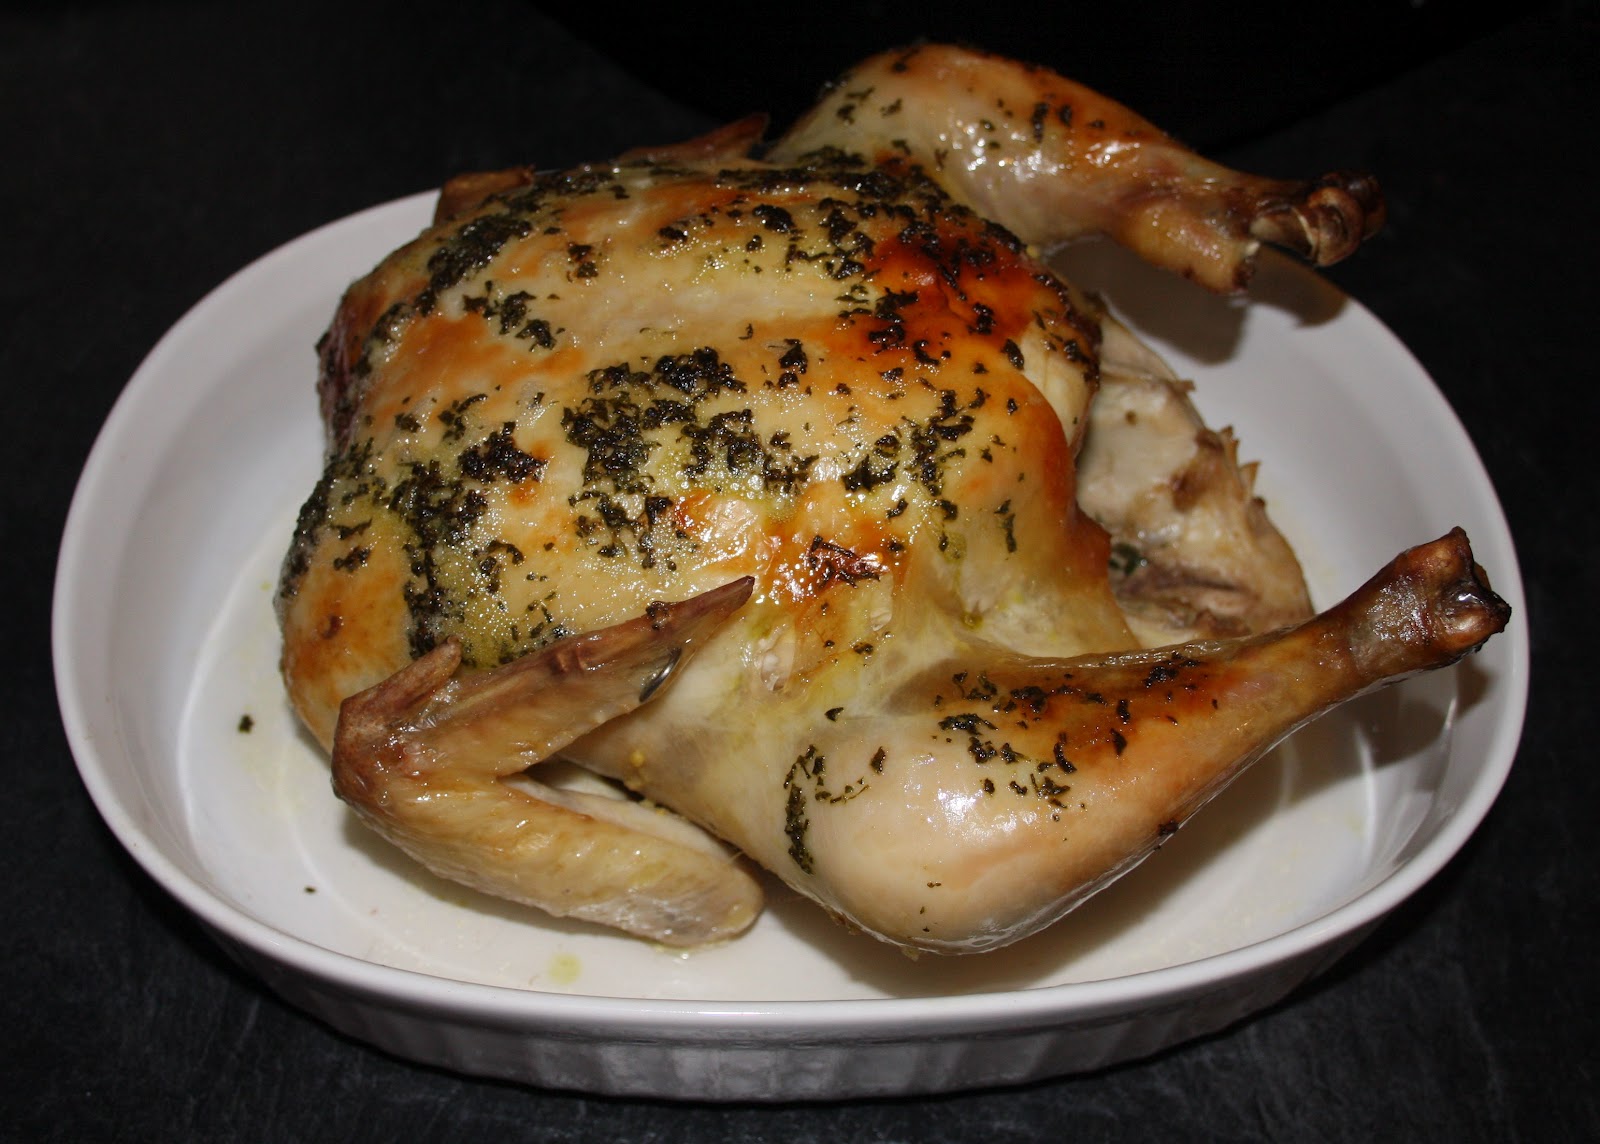
Now, I wanted to try poultry again – without nearly overcooking it - so I brined a whole chicken (1c salt/1 gal water/1 hour) and rubbed it with softened butter and chopped fresh sage (2T butter/1T sage) from my Aerogarden.  On a whim, I added 1c of white wine to the bottom of the roaster as well.  An hour later (15mins/pound at 350 degrees) – just one measly hour - I had a roast chicken Betty Crocker would be proud of.  The skin wasn’t as golden as I would have liked – I blame the steam from the wine, but the pan drippings were richly flavored and made the most delicious gravy (and, maybe it's bad, but I used some of the butter and chicken fat from my drippings to roast the locally grown blue potatoes I served alongside the chicken - they were amazing!).


Now, I still want to redo my kitchen – gas cooktop, revamped pantry, new and improved vent fan so I don’t set off the smoke detector when I use the broiler - but I’m completely sold on my roaster.  It remains unRivaled.      

Confuse-mint


My AeroGarden must know it is spring. It is growing with a fervor I’ve never seen before. The basil, thyme and dill are going well. The parsley, so-so. And, technically the chives never came up - not that they would have had a chance to grow in the shade of the mint monster that is taking over my kitchen. Easily half the space in my seven-pod garden is full of mint - which would be nice if I knew what to do with it. So, last weekend I decided to make mojitos. Traditionally one would muddle the mint in the glass, but I had a different idea. I made a mint simple syrup and it was wonderful. I used it to make fabulous mojitos and foolproof iced tea (ala Cook's Illustrated).

Mint Simple Syrup – combine 1 cup sugar (refined white or raw), 1 cup water and 1 packed cup mint leaves in a small sauce pan. Heat over med heat and stir frequently until sugar is completely dissolved (do not let the mixture boil to better preserve the mint essence). Remove from heat and let sit until cool. Strain syrup, mashing the mint leaves against sides of strainer before discarding. Use as needed (refrigerate the unused portion).

Mojitos – combine 2 oz mint simple syrup, 2 oz golden rum, 1 oz fresh squeezed lime juice, 4oz club soda. Serve in a tall glass filled to the top with crushed ice. Garnish with additional mint leaves and enjoy!

Cook’s Illustrated iced tea – combine 5 tea bags with 32 ounces (1 qt) water in a medium sauce pan. Heat 10-15 minutes over medium heat until instant read thermometer reads exactly 190 degrees. Remove from heat and let steep for exactly 3 minutes. Remove tea bags (don't squeeze them) and combine tea with 32 ounces of ice cubes. Stir until ice is almost completely dissolved. Add Mint Simple Syrup to taste. Pour into ice filled glass and enjoy.


All of the above were exceptionally delicious…but I had a question. My inquiring mind wasn’t happy with the vague use of the term “mint.” Which kind of mint did I use? I know there must be dozens of types, so I decided to do a little research. I learned mint belongs to the family Lamiaceae (which, oddly enough, includes a bunch of other aromatic herbs including basil, lavender, marjoram, oregano, rosemary, sage, savory, thyme and more) and the genus Mentha. The Mentha genus is further divided into many species the most common being peppermint, Mentha peperita, and spearmint, Mentha spicata. Good to know, but which made my ice tea so cool and refreshing and my mojito so minty? I went to the AeroGarden website. It said I had “mint.” The catalog said “mint” as well, so I called the company. The lady who answered said I am growing…"mint." Ug.


Cook’s Illustrated uses mint throughout its many recipes, so I decided to check there. The 2004 annual has a beautiful “field guide” (above) illustrating ten different species including pineapple mint, orange mint, apple mint and chocolate mint. But, it was in the 2003 annual where I found my companion in confusion. A equally agitated colleague questions which of the many mints is meant in a recipe for asparagus salad. Cook’s Illustrated answers as such:

“It may sound rather simplistic, but, like most recipe writers, when we call for mint as an ingredient, we are thinking of the mint that is available in the grocery store, which is often labled only as ‘mint.’ After doing a little research, we learned that supermarket mint is in almost all cases spearmint (Mentha spicata) rather than peppermint (Mentha peperita). While peppermint certainly can be (and sometimes is) used in cooking, it is more commonly used as a flavoring or scent in commercial products…”

The article continues by explaining the differences in the leaf and stem colors and aromatic oils flavoring each (peppermint gets its taste from menthol and spearmint, from the “light sweet flavor” of carvone).

I concluded, because my mint has pale green leaves and green stems (unlike the darker leaves and brownish stems of peppermint), I have spearmint...tons of it. All for my own enjoy-mint!  

To each his own


Recently I was involved in a discussion regarding the difference between herbs and spices - in my mind, spices are seeds and herbs are leaves – but what about other plant parts and even dried vegetables like onion and garlic powder? And how does one categorize saffron, zest, bark, extracts? (Using my definition, bay leaves would be herbs, but I’ve always considered them to be spices). My favorite procurement palace, The Spice House, groups them all together as “spices” but does have an “herb” category that includes all the typical leafy things as well as lavender (but not saffron or bay leaves which are listed as spices).

I decided to do what I love to do and research it. As with previous entries, the more I dug into the topic, the more questions I had.


First, the similarities. Spices and herbs are all inarguably parts of plants. Both are used widely in all styles of cuisine to add or enhance different flavor elements. In a typical grocery store, less the fresh items, all mingle together on the same shelves with salt, food coloring, gravy packs and chili seasoning.

A few differences. The shelf life of dried herbs seems to be in the neighborhood of six months maximum. A note - my reading states herbs generally should have some flexibility (not powder when crumbled), color (usually green), and an evident scent. Whole spices last much longer and can be kept for a year or two or more (ground = 6 months). Most herbs are relatively inexpensive while quality spices can sometimes almost break the bank.  Spices come in a range of beautiful colors and herbs are more often than not shades of green. 

I asked my good friend Merriam Webster to straighten it all out for me and didn’t find much help there either.

Spice- (noun) any of various aromatic vegetable products (as pepper or nutmeg) used to season or flavor foods

Herb- (noun) a plant or plant part valued for its medicinal, savory, or aromatic qualities.

And, just to further confuse the issue:  Spice- (verb) to season with spices


Not satisfied, I grabbed my always faithful Cook’s Illustrated annuals to get their take on the matter. While they did not clearly distinguishing between the two either, herbs seem to be those used primarily fresh (or in a dried form) and spices are seeds separated between savory or sweet applications. (Interestingly enough, CI included crystallized ginger with the “baking” spices). Julia Child, who focuses on French cooking, defines herbs as the following: parsley, thyme, bay leaves, tarragon, chives, chervil, basil, fennel (as in the plant, not the seeds), oregano, sage and saffron. Basically, she agrees that herbs are leaves and plant parts and spices (such as allspice) are seeds.

Cookbook after cookbook, article after article - even the McCormick website lists them ALL as spices - oh, and every expert has their own opinion - but all seemed to come to the same conclusion. There is no single, all-encompassing conclusion. Apparently there are clear cut spices and clear cut herbs and a huge gray area in between. So, I guess I’ll call my seeds spices and my leaves herbs but truly, these categories - I've concluded - are ultimately best left to the opinion of the cooker.

While researching the topic for which I found no real answer, I did stumble across this very cool herb and spice guide. Check it out: http://www.cnn.com/HEALTH/indepth.food/herbs/chart.html 

Say No to the Jar


Despite my penchant for making all things from scratch, there is one shortcut from which I have been unable to wean myself - jar spaghetti sauce. Recently though, a friend of mine asked me for a good marinara recipe. Much to my chagrin, I had none – nor do I have an old Italian grandma - so I did the next best thing and turned to my trusty Cook’s Illustrated annuals to see what they had to offer. In March, 2006 I found the answer…Marinara sauce in less than an hour.


After I emailed the recipe to her, I scanned the list of ingredients again and realized I had ALL of them. AND, since my youngest could and would eat saucy spaghetti – with or without meatballs - every single day, I decided to give it a try. I got out the tomatoes, garlic, onion and merlot (Yes, I keep some in the house for cooking – just cooking) and snipped fresh basil from my 7 Pod Aerogarden (I love having fresh herbs at my fingertips. It often inspires dishes depending on what is currently growing like crazy). Technically I didn’t have plain dried oregano but instead had a shaker of Mrs. Dash Italian Medley which contains oregano along with garlic, basil, rosemary, parsley, marjoram, white pepper, sage, savory, cayenne pepper, thyme, bay, cumin, mustard, and coriander – wow! Even with all the extras, I reasoned this one change would not make or break the recipe.

I chopped, minced, sautéed and simmered and the smell in the house is divine! All that is left to do is feed it to the spaghetti connoisseur and see if she approves. If so, then it’s bye-bye Ragu and Progresso…

Regarding the ingredients…Cook’s Illustrated regularly tests food products to pick the best brands. These are a few pertinent to the sauce:

~Extra Virgin Olive Oil - The highest recommendation was for DaVinci brand (they also make the “best” regular olive oil used for every day cooking). The Filippo Berio I use did rather well too.

~Whole Canned Tomatoes - Progresso Italian-Style Whole Peeled Tomatoes with Basil were the hands-down favorite with Redpack and Hunt’s right behind. (Hunt’s also won in the diced department with Muir Glen Organic Diced Tomatoes in a close second)

~Dry pasta – Ronzoni was number one with De Cecco, Mueller’s and Barilla also on the tasty list.

Here’s the recipe. I encourage all to throw away the jars and make marinara from scratch.  I did!


Marinara
Makes 4 cups. This recipe makes enough to sauce more than a pound of pasta; leftovers can be refrigerated or frozen. Because canned tomatoes vary in acidity and saltiness, it's best to add salt, pepper, and sugar to taste just before serving. If you prefer a chunkier sauce, give it just three or four pulses in the food processor in step 4.

Ingredients
2 (28 ounce) cans whole tomatoes, packed in juice
2 tablespoons olive oil
1 medium onion, chopped fine (about 1 cup)
2 medium cloves garlic, minced or pressed through garlic press (about 2 teaspoons)
1/2 teaspoon dried oregano
1/3 cup dry red wine, such as Chianti or Merlot
3 tablespoons chopped fresh basil
1 tablespoon extra virgin olive oil
1-2 teaspoons sugar , as needed (see note above)
 Instructions
1. Pour tomatoes and juice into strainer set over large bowl. Open tomatoes with hands and remove and discard fibrous cores; let tomatoes drain excess liquid, about 5 minutes. Remove 3/4 cup tomatoes from strainer and set aside. Reserve 2 1/2 cups tomato juice and discard remainder.
2. Heat olive oil in large skillet over medium heat until shimmering. Add onion and cook, stirring occasionally, until softened and golden around edges, 6 to 8 minutes. Add garlic and oregano and cook, stirring constantly, until garlic is fragrant, about 30 seconds.
3. Add tomatoes from strainer and increase heat to medium-high. Cook, stirring every minute, until liquid has evaporated and tomatoes begin to stick to bottom of pan and brown fond ("fond" is defined as carmalized bits of food) forms around pan edges, 10 to 12 minutes. Add wine and cook until thick and syrupy, about 1 minute. Add reserved tomato juice and bring to simmer; reduce heat to medium and cook, stirring occasionally and loosening browned bits, until sauce is thick, 8 to 10 minutes.
4. Transfer sauce to food processor (or transfer to saucepan and insert immersion blender) and add reserved tomatoes; process until slightly chunky, about eight 2-second pulses. Return sauce to skillet and add basil and extra-virgin olive oil and salt, pepper, and sugar to taste.

Thanks to Aerogarden for the picture: http://www.aerogarden.com/