The REAL Juicy Fruit

One day in Hawaii, my neighbor and dear friend Ann came to me with an armload of large yellow fruits.  She had picked them fresh from one of the many trees outside the joined lanais of our condo complex.  I had no idea what they were though they looked a little like monster grapefruits.  Ann handed me one and told me this was a pomelo (Citrus maxima).  A little unaccustomed to picking strange tropical fruits from my yard and eating them, I tried a piece with a wee bit of trepidation.  It was delightful - sweet, juicy, and unlike anything I’d ever eaten before.  I was in heaven.  Sometimes spelled pommelo, pumelo, or pummelo, this golden globe of goodness is simply succulent.  You must try one.
    

Until I move back to Hawaii and can pick a pomelo from a tree in my own back yard, I have to be satisfied with the ones I buy in the grocery store.  The biggest, best, freshest, and cheapest ones are found in Asian specialty groceries since pomelos are a beloved fruit native to southeast Asia.


A couple weeks ago, I was fortunate to find a heavy for its size, smooth skinned, green tinged beauty at Uwajimaya in Seattle.  Mine was about eight inches in diameter and weighed in just over two pounds.  (Depending on the specific variety, a pomelo can weigh 2-5lbs and range from 4-12" in diameter)     

Getting to the sweeter-than-a-grapefruit but more-tart-than-an-orange fruit can be a little tricky, but with the right tools, a little know-how, and a lot of patience, this flagon of flavorful vitamin C can be yours for the taking.  Wait…I must backtrack for a moment to the flavor.  The pomelo tastes like the two aforementioned citrus fruits because it is related – directly related.  The grapefruit (Citrus paradisi) is the bitter baby of the union between Sweet Mama Orange (Citrus sinensis) and the Big Daddy Pomelo. Ah ha! 


Now – here’s the how-to.  While hands are handy, a citrus peeler works the best to cut through the rind also know as zest or flavedo and uber thick (1/2-3/4") white pith underneath (albedo) without piercing the membrane covered segments (carpels) and releasing all the glorious juices contained in the pulp (vesicles).  Got that?  No?  Yes?  Here are a couple pictures to illustrate my point.

Pomelo with rind and most of the pith removed

The remnants of the rind and a pile of the pith
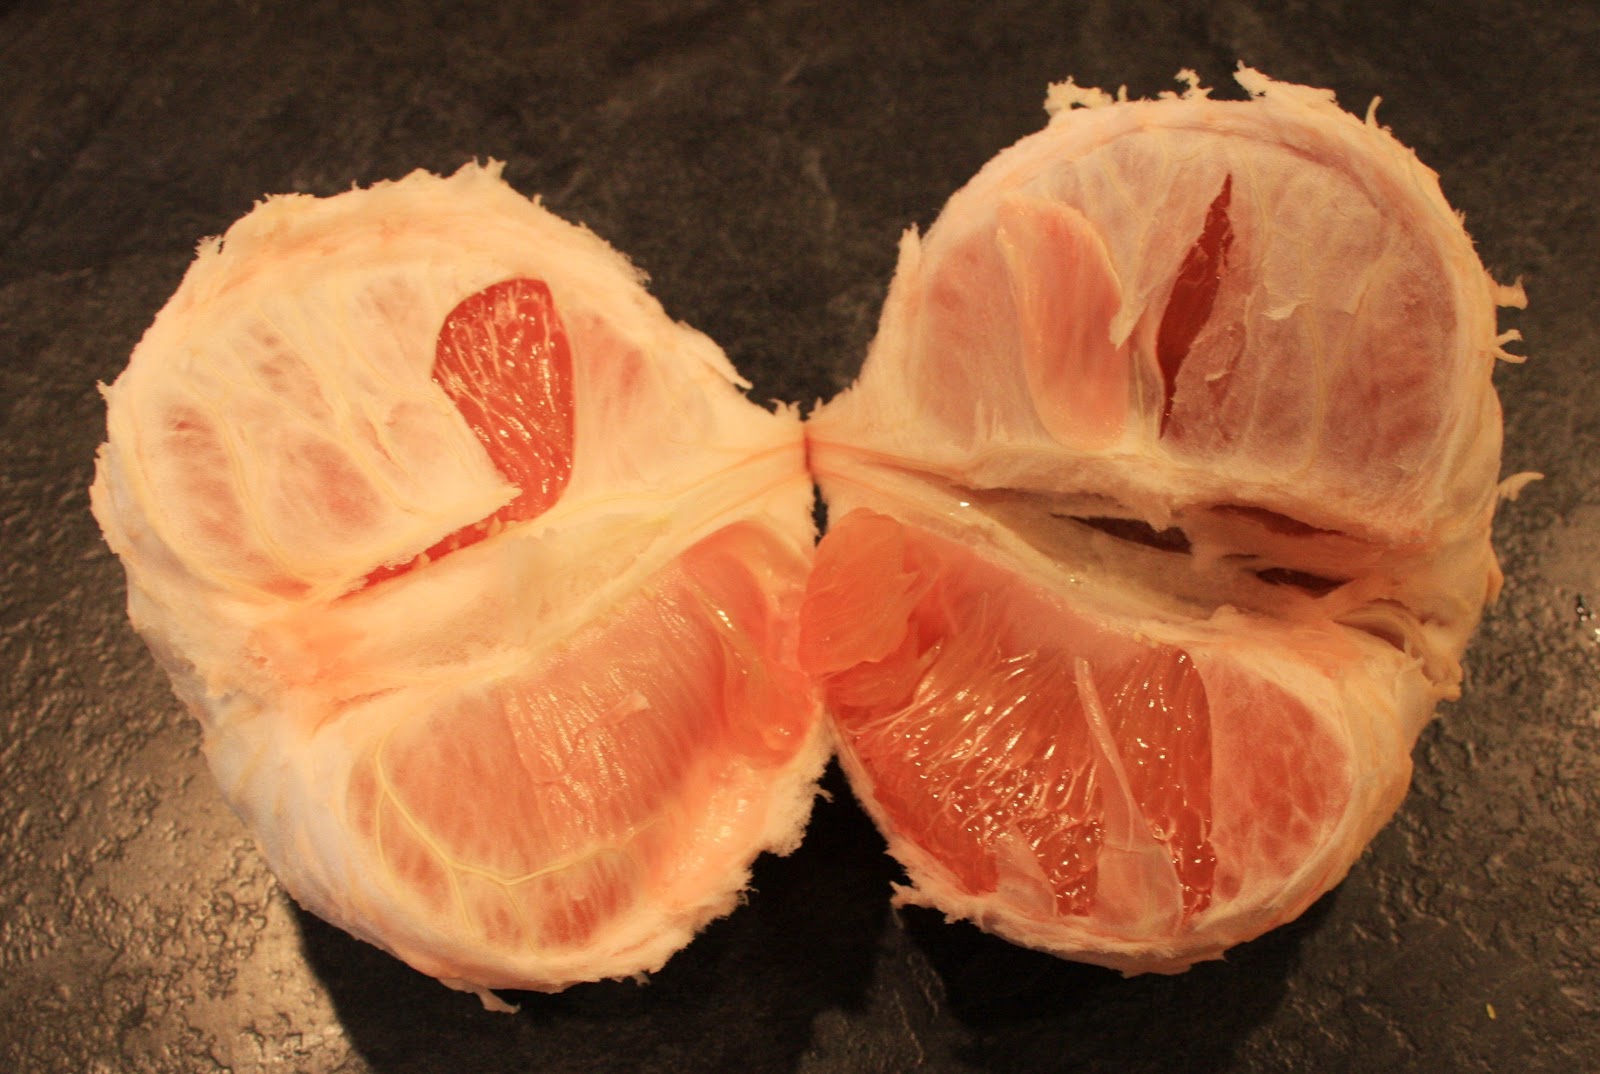
Pomelo split into halves allows access to the good stuff

The prize!

Before eating, be sure to remove every last scrap of the membrane.  It’s yucky.  While the segments are luscious, the membrane is just as bitter as that of a grapefruit – maybe more.

Oh...and one more thing.  Grab a napkin - or a few.  Better yet, get a towel.  This is one juicy fruit!  
 
Thank you to the Purdue University Horticulture department for bits of the above info.

Rival Roaster Rules!

I’ve always wanted a kitchen with two ovens – or, two ovens in my kitchen.  Whichever.  I find it frustrating when I have to remove the roast to put the side dishes back in my single oven or take out the lasagna to bake the bread...and so on.  Until I get a spare 10 grand to remodel the eatery – 20 if I get the custom granite countertops I saw at IKEA - it ain’t gonna happen.
 
In the meantime, my 12yo daughter has inadvertently come up with a temporary solution to the problem.  On Christmas morning this year she proudly slid the biggest box under the tree over to me.  She said she saved her money to buy something “that I really needed.”  Inside, I was surprised to find a 22 quart Rival brand roaster oven.  My grandmothers each had one, and my mother too – but me?  I hadn't even considered owning one.


But, now that I too had one, I used it.  For New Year’s Day, I loaded it up with a big brined turkey (1c salt/2gal water/12hours).  The instructions said to cook it for 13-19 minutes per pound at 375 degrees.  For my 16-pounder, this meant it would be done in as little as 3.5 hours or as long as 6.  I decided to compromise and check it at 4.  I was shocked to find it done – maybe even a little too done, as the upper parts of the legs looked a little crisp.  Nevertheless, the skin was golden hued and the meat was as tender and juicy as any turkey I’d ever cooked before – in far less time.

A few weeks later, I brined a 5lb local family farm raised pork shoulder roast (.25c salt/2qt water/2 hours) and roasted it at 350 degrees at 25-30 minutes a pound.  Again – done in record time, tender and juicy.  For the final test, I set one of my local family farm raised, grass fed beef roasts I’d coated with fresh ground black pepper, onion powder and garlic powder on the rack and added a cup of red wine to the bottom of the roaster.  Not only did it produce a tender juicy result but also gave me a cup of tasty pan drippings for a fine gravy.  I was amazed.


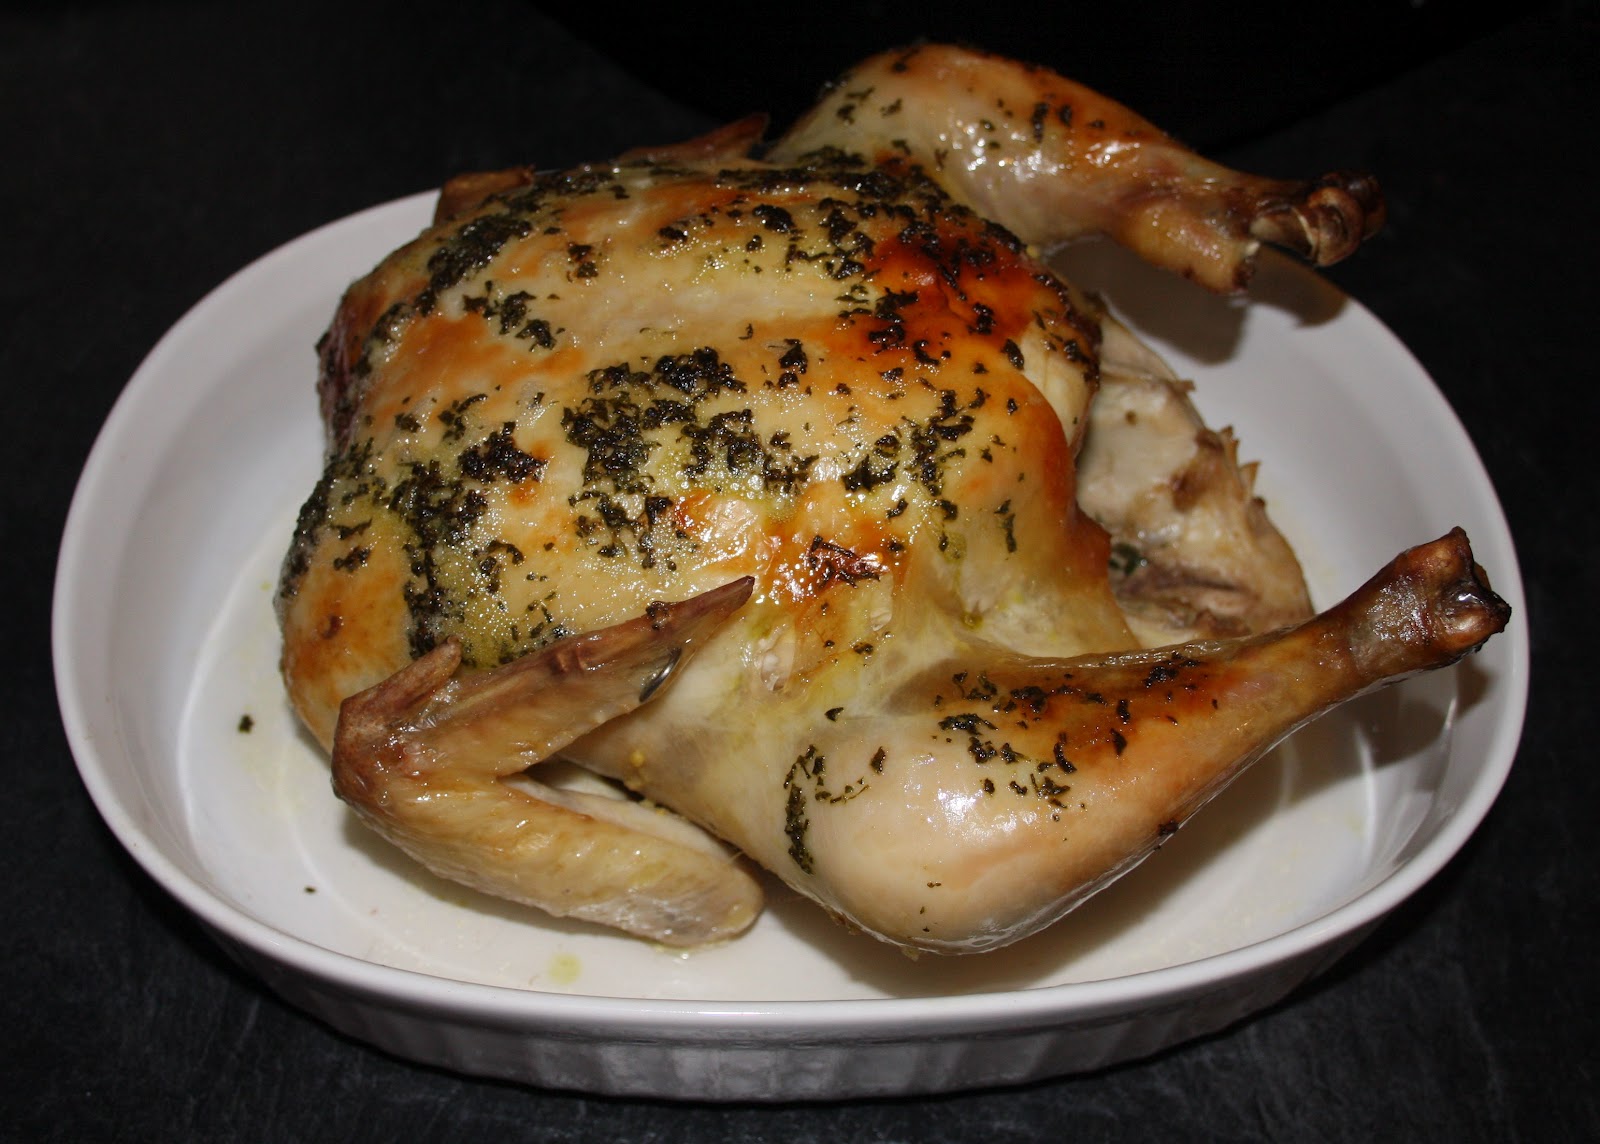
Now, I wanted to try poultry again – without nearly overcooking it - so I brined a whole chicken (1c salt/1 gal water/1 hour) and rubbed it with softened butter and chopped fresh sage (2T butter/1T sage) from my Aerogarden.  On a whim, I added 1c of white wine to the bottom of the roaster as well.  An hour later (15mins/pound at 350 degrees) – just one measly hour - I had a roast chicken Betty Crocker would be proud of.  The skin wasn’t as golden as I would have liked – I blame the steam from the wine, but the pan drippings were richly flavored and made the most delicious gravy (and, maybe it's bad, but I used some of the butter and chicken fat from my drippings to roast the locally grown blue potatoes I served alongside the chicken - they were amazing!).


Now, I still want to redo my kitchen – gas cooktop, revamped pantry, new and improved vent fan so I don’t set off the smoke detector when I use the broiler - but I’m completely sold on my roaster.  It remains unRivaled.      

A Good Cooker Will Rise Again

This bad baker has a brand new book. It was recommended to me by my cousin. I listened to her talk time after time about how easy it was to bake bread using the simple directions and drooled as she detailed delicious meals featuring loaf after loaf. I had to have a copy. I just had to!

I ordered my copy of Artisan Bread in Five Minutes a Day: The Discovery That Revolutionizes Home Baking (Francois, Hertzberg) and waited. I had my bread flour and yeast and was ready to go the minute it arrived.


The dogs alerted me to the UPS man and tried to break through the windows to tear out his throat while I was outside picking up my precious. Hands shaking, I opened the box and lifted out what I hoped to be the end of my bad bread baking.

I started reading, excited to get baking…then stopped. Unbleached flour. Not bread flour? Rats! I was determined to make the bread TODAY, so I ran to the store and bought a single five pound bag. Back home, I started over again. I added the right kind of flour, salt, water, and yeast to my KitchenAid mixer with the dough hook attached, gave it a whirl, and put the whole unkneaded mess into my largest container to wait the requisite 2 hours. Yes, it really had only taken five minutes to make the dough. Simple enough!

The timer beeped, and I went out to the kitchen only to discover my largest container was not large enough. The yeast beast had popped its top and was making its way over to my AeroGarden. Since I was learning The Master Recipe and not the herb bread (in a later chapter), I scooped him back into the bowl and carried my creation to the fridge.

The next day, I formed a one-pound boule (French for ball) and got ready for baking. The book insists a pizza peel is best to transfer the dough to the hot pizza stone in the oven, but I had none and wasn’t making another emergency trip to the store. Resourceful Cooker that I am, I decided my lipless wooden cutting board would do the trick – and it did. My perfectly formed loaf slid off my makeshift peel and into the blistering hot 450 degree oven.


Then, I waited and worried and prayed. Alas, my fears were pointless. Much to my surprise, my first loaf looked exactly like the one on the cover of the book.

Three different recipes later, I am still as enamored and amazed with my five minute bread as I was on day one. The only thing that has changed is the size of my storage container. I now have a 2.5 gallon Rubbermaid tub to keep the beast at bay.


PS – Artisan Bread has a website! http://www.artisanbreadinfive.com/

A Good Cooker Cooks Again

It’s not that I haven’t been cooking for the last six or so months; I just haven’t been publishing it. You see, in April I got the writing bug and started on what I hope is to be my first novel. Published or unpublished, I intend to see it through to the end. But, that has nothing to do with cooking – and this is a cooking blog not a writing blog (although, I do have one of those now too).

During the last six months, I’ve had so many little tidbits, rants (Lunchables makes a peanut butter and jelly sandwich?!  Really?!  Sheesh!) and recipes to share and I sure as heck couldn’t put them on my writing blog (although I was tempted), but I was dying to send them out to the world.  So, here I am again – ready to write and cook and write about cooking.

But, I can’t leave without posting one recipe for a rustic pear tart courtesy of the Food Network. Since April, I have also been working on the property surrounding the new house. I put in a 20x24’ garden (another story for another day) and some fruit trees including a Bartlett pear. They all ripened at the same time and I we can eat only so many pears.  I've never cooked with them, but my daughter asked if I would/could make a pear tart (she’d seen one in the freezer at Trader Joes).  As I said, the original recipe is not mine, but (true to my nature) I fixed this one up a bit by replacing the lemon juice with dark rum and the cinnamon with fresh grated nutmeg. Also, consider replacing the pears with apples and the lemon juice with apple jack. Ohhhh boy! It’s also delicious served warm and paired with a scoop of French vanilla ice cream. Check it out:

http://www.foodnetwork.com/recipes/healthy-appetite-with-ellie-krieger-/rustic-pear-tart-recipe/index.html

A Thrify Good Cooker

The new kitchen in the new house is nice. It has a new stainless fridge. A new stainless dishwasher. An ok stove. Plenty of cupboard room. Decent work space...and zero decoration. For countless years my kitchens were bedecked with a hot pepper motif. I had hot pepper everything from pepper cookie jars to pepper pitchers, strings of ceramic peppers and little ornamental glass peppers, a pepper cat, pepper hot mitts and pepper pot holders and even pepper salt and pepper shakers. Maybe it was the move to the country. Maybe I outgrew hot peppers. Or became allergic. Who knows. But with the move in, the peppers moved out. (I did keep the pepper cat). Hence, my new kitchen is naked and bare and awaiting adornment of some sort or another.


Now, I’m not a thrift store shopper by nature - in fact, I regularly take bags and boxes TO thrift stores in an effort to declutter and downsize - but the area where I live sports a dozen or so very cool, closer to antique store type thrift shops. A couple months ago, I was browsing in one and found an aluminum percolator coffee pot with a black Bakelite handle complete with the glass top. The chord was missing (I didn’t really plan to use it anyway), but it was in great shape. As a child I loved watching the coffee grow darker and darker as it peeped through the top of the percolator pot brewing on my grandmother’s stove. Maybe it was a sentimental moment of weakness, but I bought it – sans chord – for three bucks.


For a while my antique coffee pot sat on the back of my stove next to my new stainless tea pot while I mused about the potential old cooking implements might have as embellishments for my au naturel kitchen. Today I found myself, oddly enough, browsing in the very same store when I spied the most beguiling spun aluminum flour canister with a black Bakelite handle. I tentatively picked it up and peeked inside. Nested inside “FLOUR” was “SUGAR” then “COFFEE” and finally “TEA” - all with lids. I couldn’t believe my luck and carried them around the kitchen section for a while, put them back (partially because of the twelve dollar price tag and part due to the fact I’m trying to purge - not acquire), walked around some more all the while keeping my eye on the set to make sure no one else snatched my lovelies. Finally, I realized it was meant to be, grabbed my prize, paid the lady, and headed home.


Some sleuthing on ebay found similar sets selling for more than twice what I paid. Apparently, they hail from the 60’s and also are available in “COOKIES” and…certainly to authenticate the age, complete with strainer insert is…”GREASE.”

Maybe “Retro Culinary Chique” is in the future for my kitchen – maybe not. In the meantime I’m keeping my new old canisters…and maybe I’ll keep my eye out for more.

Confuse-mint


My AeroGarden must know it is spring. It is growing with a fervor I’ve never seen before. The basil, thyme and dill are going well. The parsley, so-so. And, technically the chives never came up - not that they would have had a chance to grow in the shade of the mint monster that is taking over my kitchen. Easily half the space in my seven-pod garden is full of mint - which would be nice if I knew what to do with it. So, last weekend I decided to make mojitos. Traditionally one would muddle the mint in the glass, but I had a different idea. I made a mint simple syrup and it was wonderful. I used it to make fabulous mojitos and foolproof iced tea (ala Cook's Illustrated).

Mint Simple Syrup – combine 1 cup sugar (refined white or raw), 1 cup water and 1 packed cup mint leaves in a small sauce pan. Heat over med heat and stir frequently until sugar is completely dissolved (do not let the mixture boil to better preserve the mint essence). Remove from heat and let sit until cool. Strain syrup, mashing the mint leaves against sides of strainer before discarding. Use as needed (refrigerate the unused portion).

Mojitos – combine 2 oz mint simple syrup, 2 oz golden rum, 1 oz fresh squeezed lime juice, 4oz club soda. Serve in a tall glass filled to the top with crushed ice. Garnish with additional mint leaves and enjoy!

Cook’s Illustrated iced tea – combine 5 tea bags with 32 ounces (1 qt) water in a medium sauce pan. Heat 10-15 minutes over medium heat until instant read thermometer reads exactly 190 degrees. Remove from heat and let steep for exactly 3 minutes. Remove tea bags (don't squeeze them) and combine tea with 32 ounces of ice cubes. Stir until ice is almost completely dissolved. Add Mint Simple Syrup to taste. Pour into ice filled glass and enjoy.


All of the above were exceptionally delicious…but I had a question. My inquiring mind wasn’t happy with the vague use of the term “mint.” Which kind of mint did I use? I know there must be dozens of types, so I decided to do a little research. I learned mint belongs to the family Lamiaceae (which, oddly enough, includes a bunch of other aromatic herbs including basil, lavender, marjoram, oregano, rosemary, sage, savory, thyme and more) and the genus Mentha. The Mentha genus is further divided into many species the most common being peppermint, Mentha peperita, and spearmint, Mentha spicata. Good to know, but which made my ice tea so cool and refreshing and my mojito so minty? I went to the AeroGarden website. It said I had “mint.” The catalog said “mint” as well, so I called the company. The lady who answered said I am growing…"mint." Ug.


Cook’s Illustrated uses mint throughout its many recipes, so I decided to check there. The 2004 annual has a beautiful “field guide” (above) illustrating ten different species including pineapple mint, orange mint, apple mint and chocolate mint. But, it was in the 2003 annual where I found my companion in confusion. A equally agitated colleague questions which of the many mints is meant in a recipe for asparagus salad. Cook’s Illustrated answers as such:

“It may sound rather simplistic, but, like most recipe writers, when we call for mint as an ingredient, we are thinking of the mint that is available in the grocery store, which is often labled only as ‘mint.’ After doing a little research, we learned that supermarket mint is in almost all cases spearmint (Mentha spicata) rather than peppermint (Mentha peperita). While peppermint certainly can be (and sometimes is) used in cooking, it is more commonly used as a flavoring or scent in commercial products…”

The article continues by explaining the differences in the leaf and stem colors and aromatic oils flavoring each (peppermint gets its taste from menthol and spearmint, from the “light sweet flavor” of carvone).

I concluded, because my mint has pale green leaves and green stems (unlike the darker leaves and brownish stems of peppermint), I have spearmint...tons of it. All for my own enjoy-mint!  

I-Love Olives!


Until I traveled around the Mediterranean and Middle East, my primitive passion for olives was limited to brined black olives from a can (which I learned are actually picked green and oxidized to give them their ebony color – yes, even the so-called “ripe” ones) as well as those little green olives stuffed with pimento strips and served on every Midwestern holiday relish tray snug between the baby dills and the radish rosettes. (There was the occasional garlic clove stuffed green olive if I felt particularly fancy). However, my globe-trotting adventures opened a whole new olive world to me – dozens upon dozens of different varieties. Who knew!

In Crete I was treated to Megaritiki olives in both their black, salty, oily, dried form (reminded me a little of prunes in appearance) and the unripe, slightly sour, cracked green variety along with rich blackish purple Kalamatas with and without pits, giant green Gaidourolias, and more. In the UAE I was served a bowl of cashews, almonds and pistachios and a second dish filled with nearly every shade and size of olives imaginable each time I sat down to eat - before I even ordered. I was in olive heaven!


Alas, all good things must come to an end, and I returned home. While I smuggled in tins of olive oil from Crete and Malta, I didn’t bring any olives. To my surprise, I began to notice olives everywhere. Maybe they’d always been there, but I soon discovered a wide variety of choices available in delis and on grocery store “olive bars.” I was delighted to have found my fix of these foreign fruits.

Fruits? What? Yes, olives (Olea europaea) - their large pit frequently removed to make room for almonds, anchovies, feta cheese, or fingers - are fruits (specifically they are drupes which are fruits with large pits or stones like avocados, cherries and peaches).  Olives are available in thousands of different cultivars and are fruits of an evergreen tree or bush grown in generally warm, dry areas of the world like the Mediterranean, parts of Africa…and California.

I was vacationing in The Golden State when I was fortunate enough to find a tasty place by the name of the Olive Pit. Located in Corning, California – just off I-5 exit 631 – this little shop is a full service olive stop. Alongside a mind-blowing inventory of pickled vegetables, vinegars, sauces, dips, nuts, oils and spices sit well over 100 breeds, variations and flavors of olives – including a magnificently monstrous 15 pound can of Musco Family Black Pearls fit for fingertips large and small. Especially special, though, is my hands-down favorite…the fabled Graber Olive.


Graber olives are unique in the fact that they truly are tree-ripened before brining (unlike the aforementioned black olive). These large, almost round, globes of goodness sport a variegated green/reddish brown color and a soft, mild flavor that is…well, it is indescribable. Even at $6 a can, I can say without reservation these succulent beauties are worth the price.  I guarantee it.  They are always the first thing eaten when I feature them on an antipasto platter.


My hands are much bigger than when I delighted in sticking black olives on each finger and there are so many more kinds of olives to love, but I was glad to find the Olive Pit Super Colossal size fit exceptionally well on my grown-up fingers – and even thumbs.

Here are a few random olive facts courtesy of http://www.olives.com/
~It is generally believed that the first olive trees came from countries surrounding the Mediterranean Sea.
~The Bible refers to the olive tree as the "king of trees" and the "tree of life." Indeed, the cultivation of olives predates any written language.
~Spanish Missionaries brought the olive tree to North America in the 1700's.
~California boasts 1,200 olive growers growing approximately 35,000 acres of olives.
~Each extra large olive only has 7 calories 
~Olives are cholesterol free and contain large amounts of monounsaturated fat which is thought to lower artery clogging LDL-cholesterol and raise beneficial HDL levels.

(Graber Olive can picture courtesy of the Olive Pit website)

Make a pit stop at the Pit: http://www.olivepit.com/  
Grab a Graber: http://graberolives.com/